Front Panel Project Home Page | WhippleWay | Books | Intel 8080 Emulator | Assembly Language | Learn Coding
|
WhippleWay
From Scratch Books & Front Panel Projects
|
From Scratch Books
If you are not familiar with the phrase "From Scratch", it is used in food preparation, principally in baking, to mean to make from raw ingredients and not from a commercially prepared mix. In my "From Scratch" books, I follow this approach; that is, I start with a minimal set of facts about a subject, develop relevant theory about the subject, and confirm the theory with a practical application. As an example, in my book "Build Your Own Computer - From Scratch", I start with three logical concepts (AND, OR, and NOT), develop sufficient computer theory to design a working computer, and finally build a working computer. A basic "From Scratch" premise is that the reader has little background knowledge or experience in the subject. If you want to give my "From Scratch" approach a try, the "Introduction to Programming - From Scratch" example below is free. For a small cost, you can purchase my other "From Scratch" books from Amazon by linking here.
|

|
Introduction to Programming
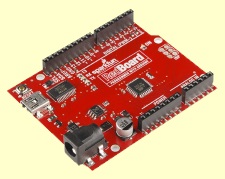
Beginners usually take the “magic box” approach to computers. Ignoring its inner workings, they start by learning a high-level language that gives them access to the computer's basic capabilities. As more experience is gained, performance issues or the need to manipulate hardware calls more fully for greater insight into the computer's hardware and software capabilities. Or perhaps they just grow curious and want to know how computers work. To this end, the Build Your Own Computer (BYOC) and Front Panel Projects have been designed. The BYOC Project begins with the first principles (AND, OR, and NOT logic) and carries out a basic computer design finishing with a working computer using a Field Programmable Gate Array (FPGA). A knowledge of computer science or electronics is not needed to follow along. More information on the BYOC Project is found here . The Front Panel Project offers additional insight, focusing on programming through a series of experiments (left panel) that explore computing at a more rudimentary level, starting with machine language, transitioning through assembly language, and finally arriving at a high-level language, AVR Tiny BASIC. In the beginning, experimenters use an Intel 8080 emulator with an Altair 8800 inspired front panel complete with switches and flashing lights. Eventually, the focus turns to a modern microprocessor computing using the ATmega328 and its built-in peripherals on a SparkFun Redboard. By exploring computers from the inside out, the range of hardware and software solutions is greatly expanded.
|

|
|
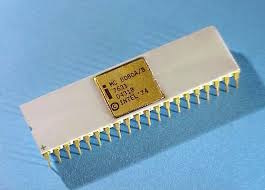
Intel 8080 Microprocessor
|
MITS Altair 8800
|
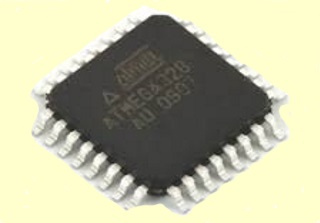
ATMEL ATmega328 Microprocessor
|
SparkFun RedBoard
|
|
|

|
|
|
|
Below is a sampling of programming languages. In each case, assume a LED is connected to pin 13 of the SparkFun Redboard and turned on by the program line(s) shown.
|
        10 DIR(13,1)
        20 POUT(13,1)
|
Tiny BASIC is a high level language that resembles standard English. The programmer assigns line numbers (like "10" in the example) according to the order of statement execution. The DIR statement configures pin 13 (first parameter = pin number) for outputting (second parameter = "1" for output or "0" for input). Similarly the POUT statement sets pin 13 to "1" a high ("1" outputs a high or "0" outputs a low) turning on the LED. One advantage of BASIC for beginners is that it permits most statements to be executed directly from the keyboard so that the statement's effect is immediately known. This encourages experimentation and simplifies testing. It should be noted that standard BASICs would probably not have a statement like this. It was added to open source AVR Tiny BASIC in Experiment 12 as a custom statement.
|
        void setup() {
          pinMode(13, OUTPUT);
        }

        void loop() {
          digitalWrite(13, HIGH); // turn the LED on (HIGH is the voltage level)
        }
|
C++ is a high-level language that allows greater access to the microprocessor hardware, but retains a good human language interface. The code seen here is actually an Arduino "Sketch" that uses C++ functions to link user code to a compiler that prepares the actual code to be executed on the Redboard's ATmega328.
|
        .equ ddrb = 4
        .equ portb = 5
        ;
        ; Set Up Digital I/O
        ;
        SBI ddrb,5 ;set pin 13 (direction register port b bit 5) LED as output
        ;
        ; Main Program
        ;
        SBI portb,5 ;turn on LED on pin 13 (port b bit 5)
|
Assembly language as seen here is a low-level programming language that implements a symbolic representation of the microprocessor's machine codes and other constants needed to create a machine level program. The first SBI (Set Bit I/O Register) instruction sets the data direction for I/O register PORT B bit 5 (pin 13 on the SparkFun Redboard). A second SBI sets the port and bit to high turning on the LED.
|
        9a2d 1001101000100101 ddrb = 4 bit =  5
        9a21 1001101000101101 portb = 5 bit = 5
        SBI code byte = 10011010AAAAABBB
        where AAAAA = port# BBB= bit#
|
To the left is actual machine language code that turns on the LED. The two 16-bit instructions begin with the SBI (Set Bit I/O Register) instruction code "10011010" followed by port register numbers "00100" and "00101" (direction register 4 and data register 5 respectively) and end with the bit number "101" (decimal 5). The first instruction sets the direction of port bit 5 to output (port B data direction is controlled by port register 4). The second instruction sets the port bit to high (port B data is read or written to port register 5). The machine code is the same as that generated by the assembly language program lines above, but lacks the helpful mnemonics and labels. Keep in mind that machine code executing in the microprocessor is actually what turns the LED on. Assembly language's precise control of the microprocessor and its resources offers great potential for maximizing program performance and efficiency.
|
The Front Panel Project contents are listed below. Take the items in order or skip around. Experiments 1 to 4 use machine coding with the Front Panel 8080 emulator. In Experiments 5 to 7, programming is done in assembly language and testing with the Front Panel 8080 emulator . Experiments 8 to 12 utilize ATMEL Studio 7 integrated development platform with testing on the SparkFun Redboard. In Experiment 12, open source AVR Tiny BASIC is customized to access ATmega328's peripherals on the SparkFun Redboard.
For More Information or to report problems, contact: Dick Whipple at [email protected]